译文/Translated:
Scatter是一个浏览器延伸套件,让您能够流畅地连接至EOS区块链网络,管理代币并进行价值交易。
开启Scatter之旅,请访问Get-Scatter.com
在进行以下步骤之前,请确认您已使用 beta faucet将代币转移至beta账户。Eosfinex beta faucet将给您所必须的1个EOX,用以在eosfinex上创建beta账户。
使用Scatter注册
请访问paper.eosfinex.com,使用Scatter注册
一旦注册成功,请按照以下说明进行:
1.点击“登录”。
2.点击“首次连接”。
创建账户时,选择您想要转移至侧链的EOX。最低数额为1EOX。
确保Scatter能在您的电脑上运行。
3.点击“使用Scatter创建”
若您尚未将账户连接至EOS mainnet,您将看到以下信息(若您已经连接至EOS mainnet便不会看到此信息,且此步骤将省略)。
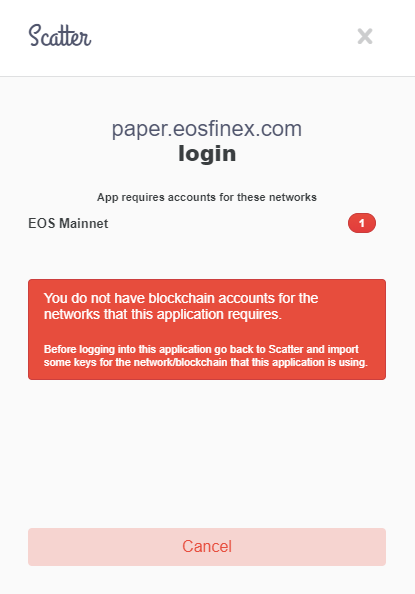
4.点击取消。
5.打开Scatter。
6.若您尚未将“EOS Mainnet”作为网络选项添加至Scatter,请前往设置。
7.点击网络。
8.点击添加。
9.添加以下信息并点击保存。
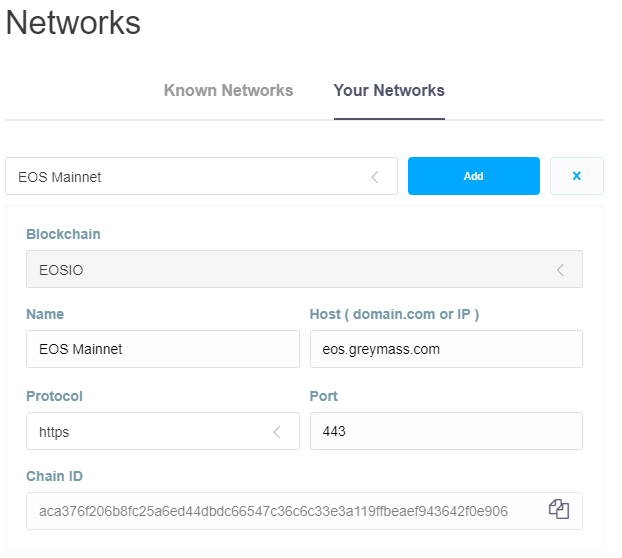
10.点击您想使用的账户。前往“添加账户”。
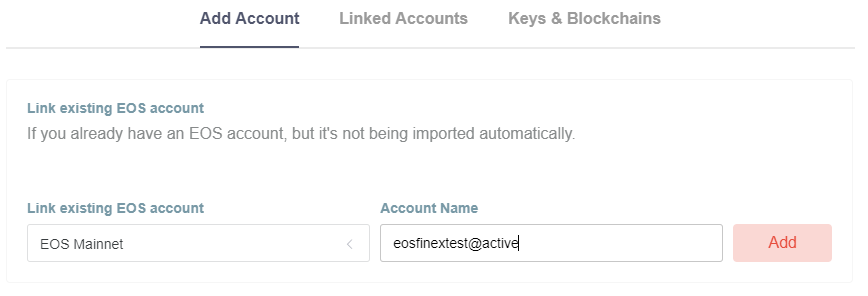
11.输入您的_用户名@active并点击“添加”。
12.若您没有EOS账户,点击“创建账户”,创建一个新的账户。
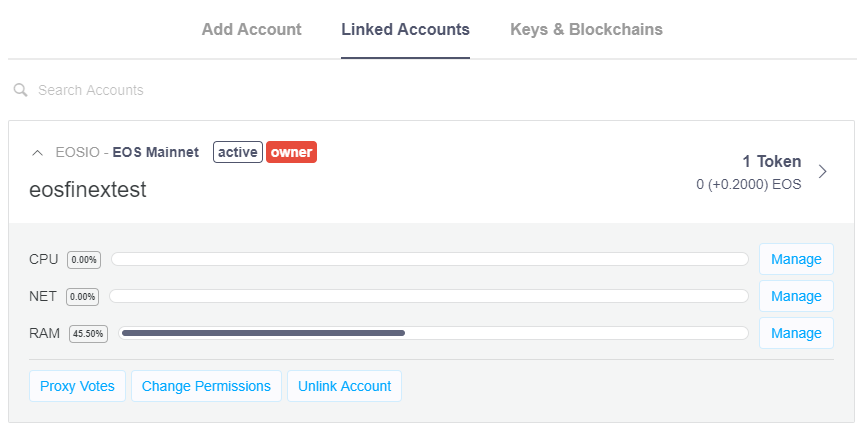
13.一旦您添加了账户后。将为您显示“关联账户”此类信息。
14.返回登录界面,点击“使用Scatter注册”。
您将看到以下屏幕信息:
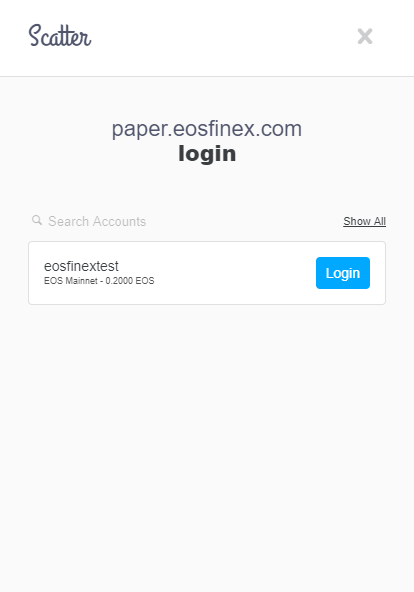
15.点击“登录”。此后,系统将询问您是否确认转移代币,以创建eosfinex侧链账户。
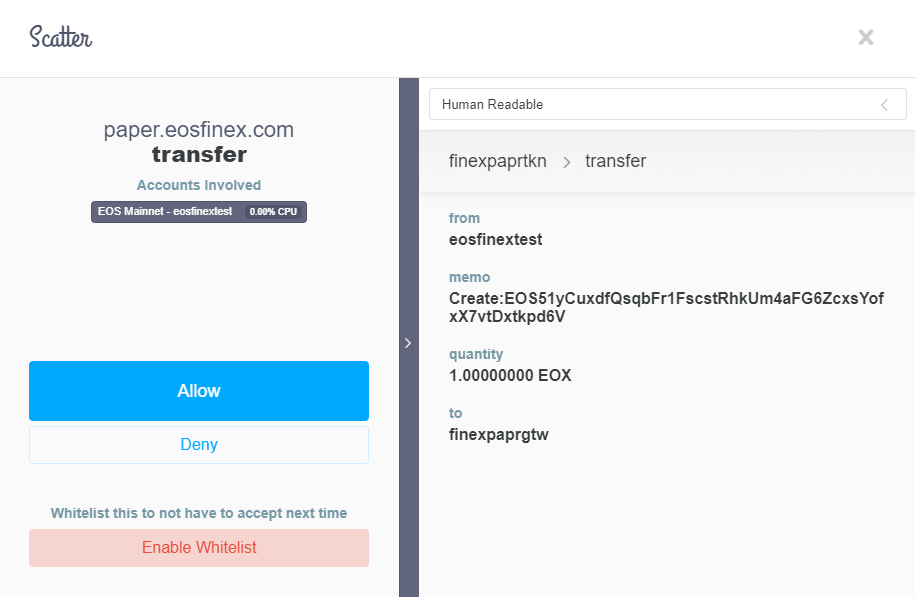
16.点击“允许”。若界面出现“未找到余额目标”的类似信息,代表您尚未使用beta faucet转移代币。请参考本文章首页内容,并重复该步骤。
现在您已创建账户,您可以在界面看到以下内容:
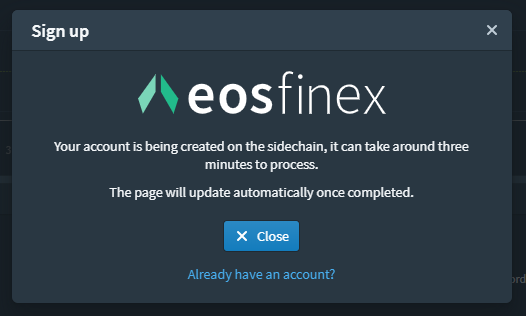
请等候数分钟时间,以完成交易。即便您关闭窗口,该项操作仍将继续。
使用Scatter登录
1.前往“登录”。
2.点击“连接Scatter桌面”。您将看到以下类似界面:
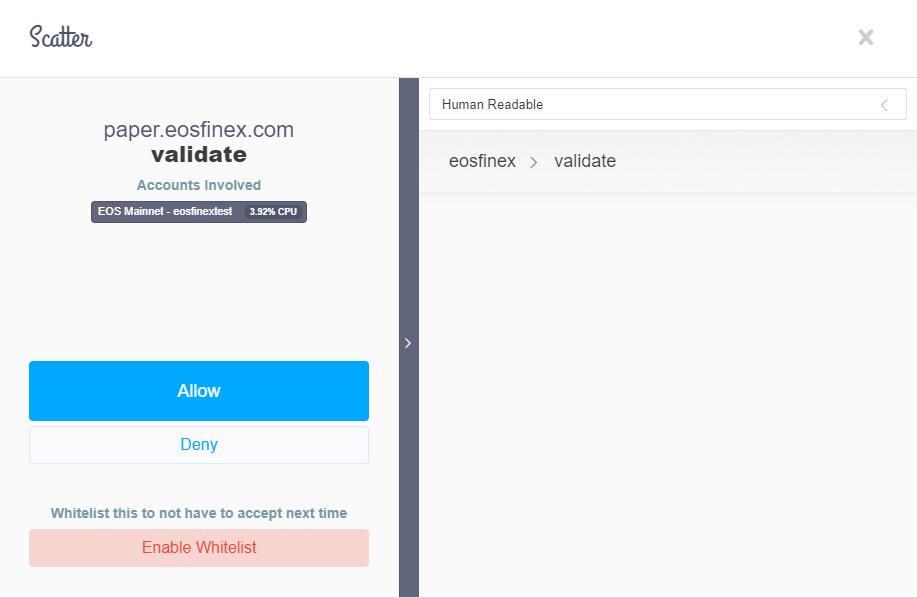
3.点击“允许”。您将看到以下类似界面:
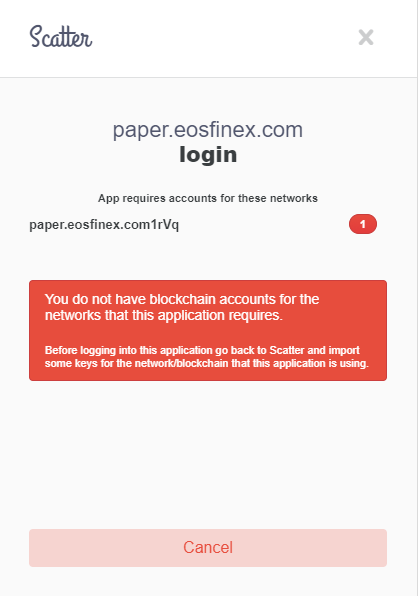
4.在此阶段,您现在需要将账户连接至eosfinex侧链。为完成此项操作,请点击“取消”。
5.打开Scatter。
6.选择您想要登录的用户账户。
7.点击“添加账户”。在下拉菜单中选择eosfinex侧链,并输入你的_用户名@active并点击“添加”。您将看到以下界面。
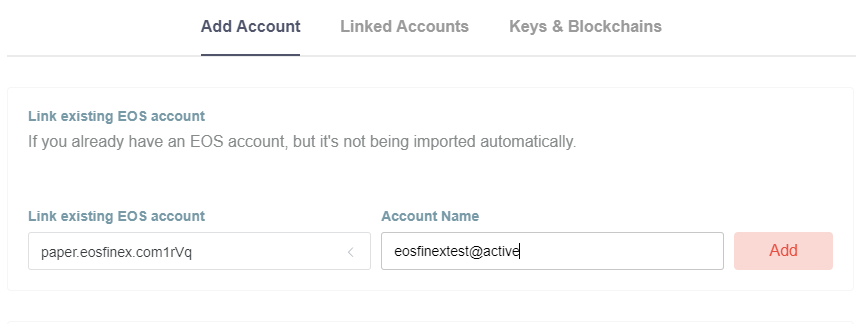
8.您现在可在您的关联账户中看到侧链,界面如下:
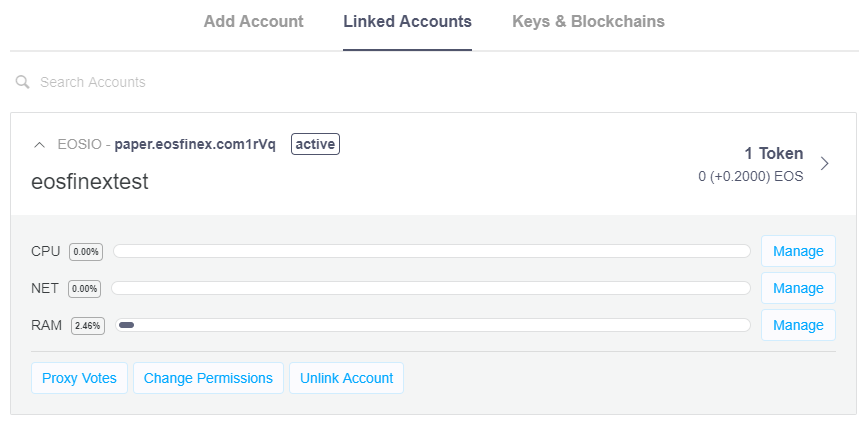
太棒了!您现在能够使用Scatter登陆了!
持有疑问?请访问eosfinex Telegram寻求帮助。

请在paper.eosfinex.com试用eosfinex 测试网!
请访问Tutorials and Lessons,了解教程详细内容。
原文/Original:
Scatter is a browser extension that allows you to connect to the EOS blockchain network, manage tokens and exchange value — seamlessly.
To get started with Scatter, visit Get-Scatter.com.

Before following these steps, make sure you have transferred tokens to your account for the beta by using the beta faucet. The eosfinex beta faucet will give you the 1 EOX required to create a beta account on eosfinex.
Signing up using Scatter
To sign up using Scatter, start by visiting paper.eosfinex.com. Once there, follow these instructions:
- Click ‘Login’.
- Click ‘First time connecting’.
Select the amount of EOX you want to transfer to the sidechain when creating your account. The minimum value is 1.
Make sure Scatter is running on your computer.
3. Click ‘Create with Scatter’.
If you have not connected your account to the EOS mainnet, you will see the following message (if you have already connected to EOS mainnet/don’t see this message, this step can be skipped).

4. Click Cancel.
5. Open Scatter.
6. If you do not have ‘EOS Mainnet’ added as a network in Scatter already, go to Settings.
7. Click Networks.
8. Click Add.
9. Add the following and click Save.

10. Click the account you want to use. Go to ‘Add account’.

11. Enter your_username@active and click ‘Add’.
12. If you do not have an EOS account, click ‘Create Account’ to make one.
13. Once you have added your account. It will show up in ‘Linked Accounts’ similar to this.

14. Go back to the login screen and click ‘Signup with Scatter’.
You should now see the following screen:

15. Click ‘Login’. After this, you will be asked to confirm the transfer to create your sidechain account on eosfinex.

16. Click ‘Allow’. If you experience an error here similar to ‘no balance object found’, you have not transferred tokens using the beta faucet. Please refer to the top of this article and repeat the steps.
Your account is now being created and you should see a screen similar to this:

Please allow several minutes for the transaction to complete. The process will continue even if you close the window.
Logging in using Scatter
- Go to ‘Login’.
2. Click ‘Connect with Scatter Desktop’. You will a screen similar to:

3. Click ‘Allow’. You should see a screen similar to this:

4. At this stage, you now need to link your account to the eosfinex sidechain. To do this, click ‘Cancel’.
5. Open Scatter.
6. Select the user you’re trying to log in with.
7. Click ‘Add Account’. Select the eosfinex sidechain in the dropdown and enter your_username@active and click ‘Add’. This is visualized in the screenshot below.

8. You should now see the sidechain in your linked accounts, similar to this:

Voila! you should now be able to log in using Scatter.

The eosfinex testnet is here! Try it out on paper.eosfinex.com.
For tutorials, visit ‘Tutorials and Lessons’.
Voila! you should now be able to log in using Scatter.
原文链接/Original URL: